
 Canada EN
 Mexico ES
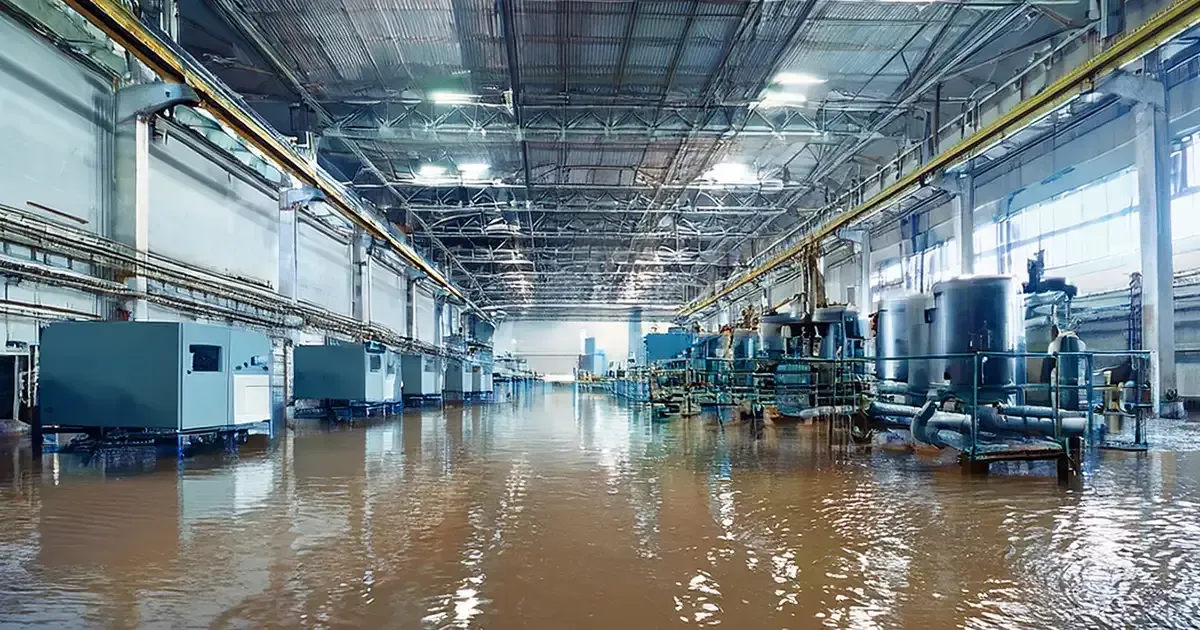
Table of Contents:
Understanding the Impact of Water Damage | Initial Assessment and Safety Precautions | Step-by-Step Process | Wrap Up
Water damage to electrical equipment is a serious issue that can disrupt operations in industrial and manufacturing environments. Whether caused by flooding, leaks or condensation, water exposure can lead to equipment failure, safety hazards and costly downtime.
Salvaging and restoring water-damaged equipment requires caution and safety measures to prevent any hazards and ensure the equipment functions properly. Water and electricity are a dangerous combination, and any electrical equipment exposed to water can pose serious risks if not properly managed.
Even if the equipment appears dry, residual moisture can lead to corrosion, short circuits and electrical fires. Considering the potential risks, it’s recommended to have water-damaged electrical equipment evaluated by a qualified electrician before attempting to restore or use
Understanding the Impact of Water Damage

One of the primary concerns with water-damaged electrical equipment is the potential for long-term safety hazards. Floodwater often contains contaminants such as chemicals, sewage and debris, which can compromise the integrity and performance of electrical components.
Water can cause significant damage to electrical equipment by:
- Reducing the integrity of electrical insulation.
- Corroding metal components.
- Short-circuiting electrical systems.
- Introducing contaminants that can further degrade equipment.
Initial Assessment and Safety Precautions
Turn Off Power: Before attempting any salvage operations, ensure that the power supply to the affected equipment is completely disconnected.
Wear Protective Gear: Use appropriate personal protective equipment (PPE) such as insulated gloves, rubber boots, and safety goggles to protect against electrical shock.
Assessment: Begin by visually examining all components, including wiring, outlets, switches, and circuit breakers to evaluate the extent of the damage. Look for signs of corrosion, rust, or greenish discoloration, which indicates oxidation. Determine if the equipment can be salvaged or if it needs to be replaced. Consult the equipment manufacturer for specific guidelines on handling water-damaged equipment.
Step-by-Step Process to Restore Water-Damaged Electronics and Electrical Equipment
Restoring water-damaged electrical equipment requires a meticulous and systematic approach to ensure safety and functionality. This step-by-step guide provides detailed instructions on how to disassemble, clean, dry, and test your equipment, using specialized tools and products to achieve optimal results. By following these procedures, you can effectively remove moisture, contaminants, and oxidation, ultimately restoring your equipment to its original working condition. Let's dive into the process and explore each step in detail.
Disassemble the Equipment (if possible)
- Carefully remove covers, casings, and panels to expose internal components.
- Take photos before disassembly to help with reassembly later.
Remove Excess Moisture
- Use absorbent microfiber cloths to wipe off visible water.
- For intricate components, a wet/dry vacuum can help extract trapped moisture.
Clean Components
- For Non-Electronic Parts (Casings, Wires, and Panels): Use isopropyl alcohol (90% or higher) and a soft brush to clean dirt and contaminants. A mild detergent and warm water can be used for plastic casings.
- For Circuit Boards & Internal Components: Use a contact cleaner spray such as CRC QD® Electronic Cleaner to remove oxidation. Apply compressed air to remove debris and dry delicate parts.
Apply Degreaser
To remove oil, grease, and sludge contamination not removed by water flushing or compressed air, thoroughly spray equipment with a degreaser. Be sure to spray switch gear and control boxes liberally and cover all contaminated areas. CRC offers several degreaser options that work well in this situation:
- CRC Heavy Duty Degreaser: A non-flammable formula with fast evaporation and no residue left behind.
- CRC Heavy Duty Degreaser II: The same great cleaning power in a non-chlorinated formula.
- CRC T-Force® Degreaser MUO: Evaporates rapidly, leaves no residue, and is great in manufacturing environments.
- CRC T-Force® Degreaser MUO Non-Flammable: Quickly dissolves grease, oil, and sludge from mechanical equipment in a non-flammable formula.


Dry the Equipment Thoroughly
- Place components in a warm, dry environment with proper ventilation.
- Use a dehumidifier or silica gel packets to speed up the drying process.
- Avoid using direct heat sources (like hairdryers) as excessive heat can damage circuits.
- If available, a vacuum drying chamber can be used for thorough moisture removal.
- Apply a moisture-displacing lubricant to aid in removing additional moisture. CRC 3-36® Multi-Purpose Lubricant & Corrosion Inhibitor and CRC 2-26® Multi-Purpose Precision Lubricant are great choices to finish up the cleaning process while lubricating and leaving behind a barrier to prevent against corrosion.
Test the Equipment
It’s important to test all equipment before returning to normal operation. If the machine has been disassembled, now is the time to reassemble it for testing. Using a megohmmeter to take megger readings on electrical equipment after it has been cleaned and dried is an essential step to ensure the equipment's insulation integrity and safety. Here’s a step-by-step guide to help you through the process:
- Check for Moisture: Ensure equipment is completely dry and free of any residual moisture.
- Workspace Safety: Verify that the electrical system is de-energized, and the test area is safe to work in.
- Select Test Points: Choose clean, dry, and contaminant-free test points on the equipment. This ensures accurate insulation resistance measurements.
- Connect the Megohmmeter: Attach one lead to the equipment's ground and the other to the conductor being tested. Ensure a solid connection to avoid erroneous readings.
- Select the Test Voltage: Choose an appropriate test voltage based on the equipment's specifications. Common test voltages range from 250V to 1000V for low-voltage equipment and up to 5000V for high-voltage equipment.
- Perform the Test: Press the test button on the megohmmeter and hold it for the recommended duration, usually around 1 minute. Record the resistance reading in megohms. Repeat the process for different conductors and compare the readings.
Analyzing the Results
After taking the readings, analyze the results to determine the insulation condition. High resistance values (typically above 1 megohm) indicate good insulation, while low values suggest potential insulation damage. If the readings are consistently low, further drying or cleaning may be necessary, or the equipment might need repair or replacement.
Do Not Energize Until Minimum Resistance Levels are Obtained
When Megger readings indicate minimum resistance levels have been reached, energize motors and pumps under “no load” conditions. Allow equipment to run for an average operating period to continue drying under normal conditions. When Megger readings return to normal, motors and pumps can be used in a normal loaded manner.
Apply a Precision Cleaner
Once safe operating levels have been achieved, it’s time for the final step in the restoration process. Applying a precision cleaner to low voltage contacts will remove any stubborn oxidation or debris left over from the initial cleaning efforts. CRC offers several great options in precision cleaners:
- CRC NT™ Precision Cleaner: Effectively removes dirt, light oils, and other contaminants from electronic equipment. It evaporates quickly, has no flash point, and leaves no residue.
- CRC Contact Cleaner 2000® Precision Cleaner: A next-generation electronic contact cleaner that boasts the strongest cleaning performance available in a contact cleaner.
- CRC QD® Contact Cleaner: Perfect for cleaning sensitive electronics. It evaporates quickly, leaves no residue, and is safe to use on all plastics. Use where lower flashpoint cleaners are acceptable.
- CRC XT-2000™ Precision Cleaner: A non-flammable, low odor, rapidly evaporating precision cleaner for use in electrical and industrial applications.


Wrap Up on Salvaging Water Damaged Electronics and Electrical Equipment
Salvaging electrical equipment after water damage from flooding involves a series of important steps to ensure safety and functionality. Disconnecting power sources, thoroughly drying the equipment, and inspecting insulation are crucial initial actions. Consulting manufacturer guidelines and choosing the right cleaning products are essential steps in navigating the recovery process.
Reconditioning or replacing damaged components should be done with a focus on safety and compliance with operational standards. By following these steps, you can maximize the chances of successfully restoring your electrical equipment while minimizing risks.